I have been reading all over the HPIBajaForum.com about people adding lights to their Bajas, but I was reluctant to give this mod a try. However, Fanatix.gr, the Greek HPI importers announced the next Baja Race will take place on next Sunday, November 30. So, what? you would ask. Well... they announced that the race would be FIVE hours. So, what? you will ask again. Well... again... crazy as they are, they said the first two hours would be at the FRT ASPHALT track and the next three hours on the dirt. With a difference: The asphalt race would start at 5.00AM!!!
It's obvious we would need lights! I once again turned to my brother-in-law, who is an expert with electronics and car (real and model!) electrics for help.
Here's what we (actually HE!) accompliced:
On Saturday afternoon he did the first light pod:
I bought 24 super bright LED's from a local electronics shop, while my B-I-L had already found 6 red LED's.
I just mounted the one light pod on the car and took it out in our back yard, just to see what it would look like.
And a small video of the first evening in our back yard, with JUST one light pod finished:
On Sunday morning I moved to his house and he did the second light pod and the taillights.
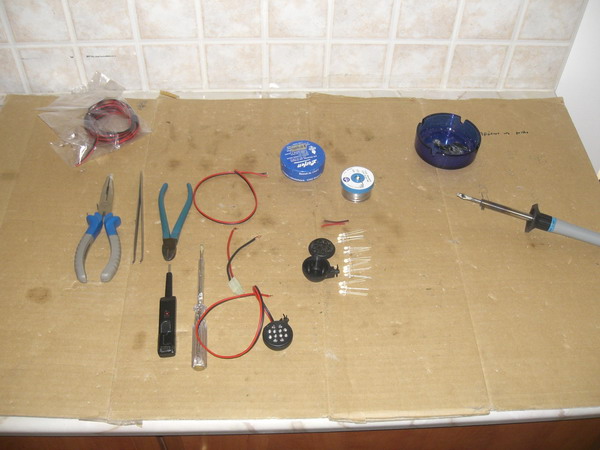
The workshop with everything needed. What you don't see are cigarettes and coffee pots!
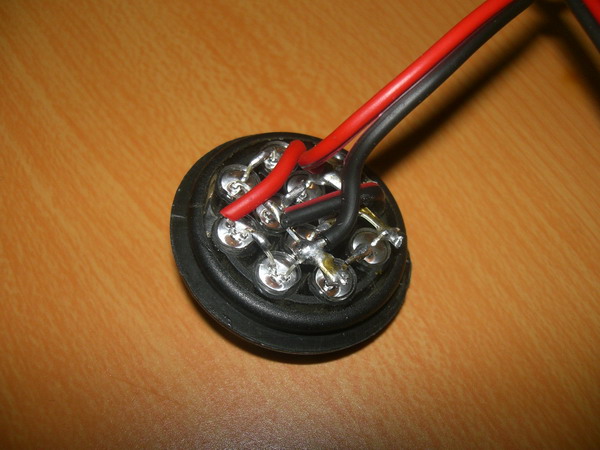
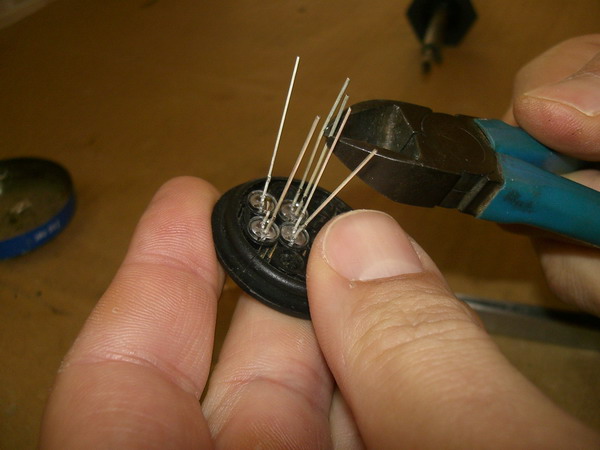
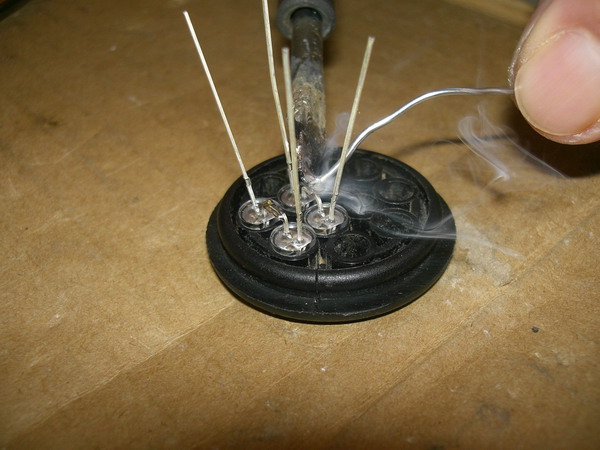
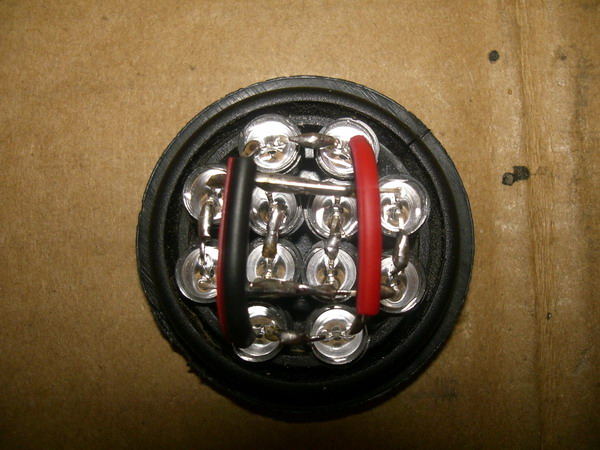
Mounting the LED's on the pod. Then starting to cut the long rods and doing the soldering.
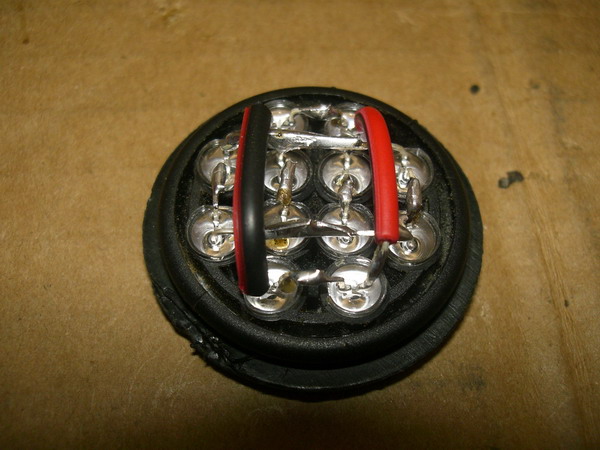
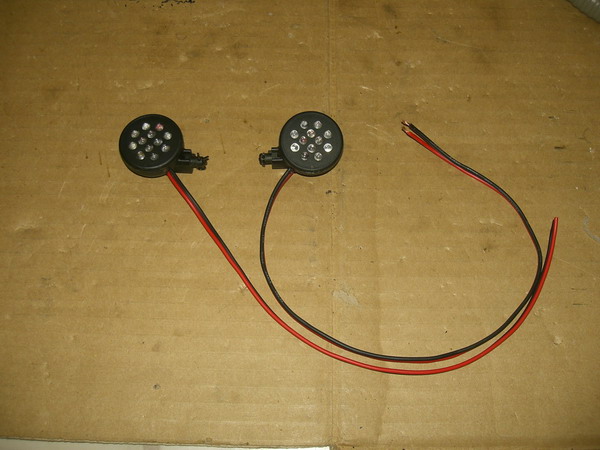
The finished pod.
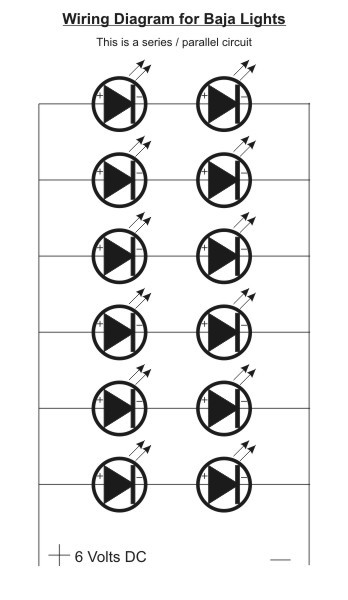
This is the schematic on which we based our LED's. (Borrowed from a post at the HBF! Thanks!)
Using the pattern above, we soldered the LED's in parallel AND in series, so we didn't need to add resistors. We intended to plug all the LED's directly to the receiver battery pack.
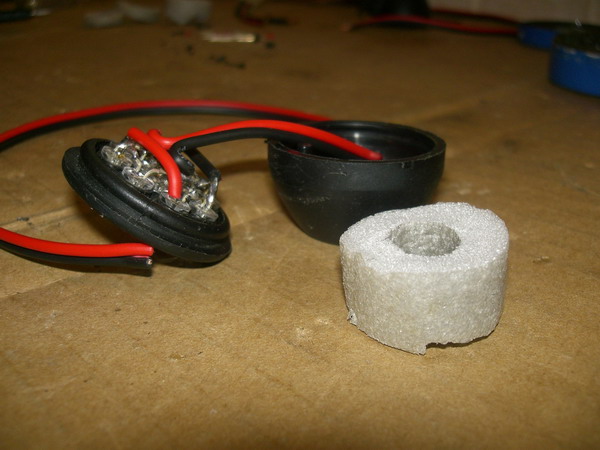
Ready to close the pod.
Before closing the pod, we inserted some fairly hard foam, carefully shaped to fit inside the pod.
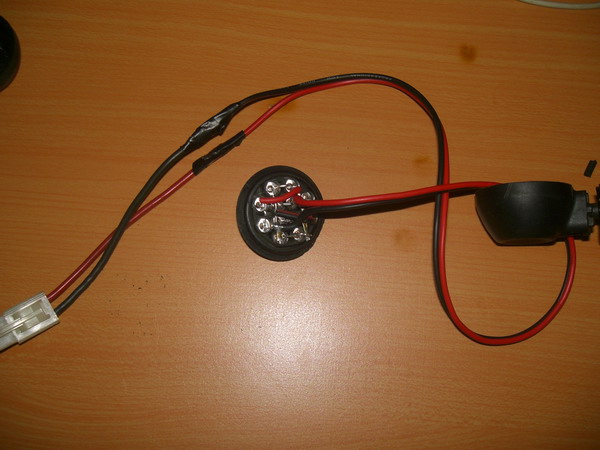
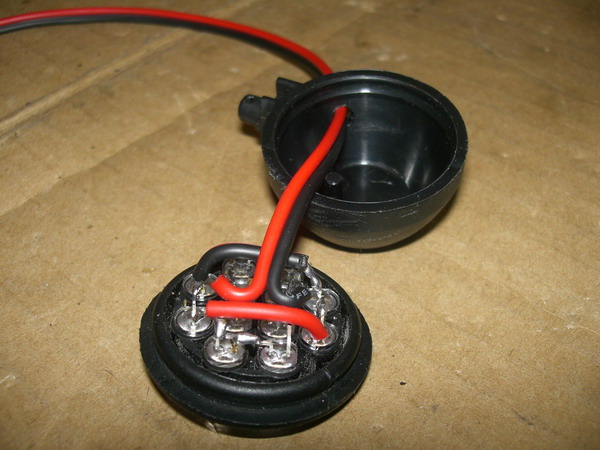
The front lights are finished and there are a couple of connectors for the tail lights.
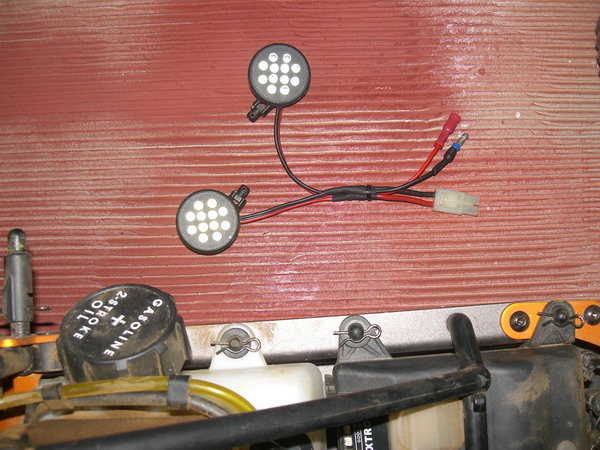
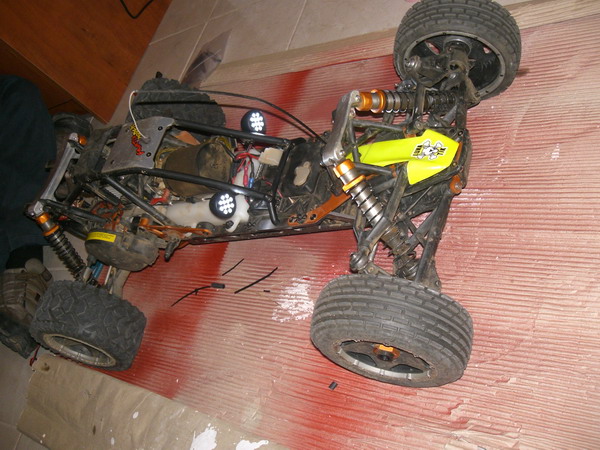
This is how the wiring looks in the car.
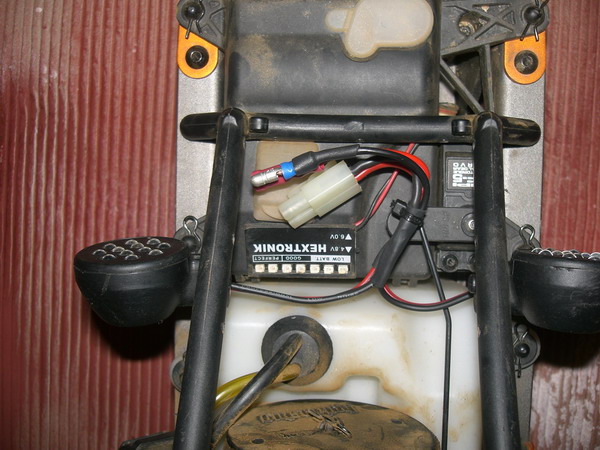
We routed a suitable pair of cables to the rear of the car, running alongside the lower right side of the chassis, right under the radio box and the fuel tank. Then, careful that the cables would not flop around any moving or rotating parts of the car, we zip-tied them along the route, until they were around the lower bumper.
The hard part followed:
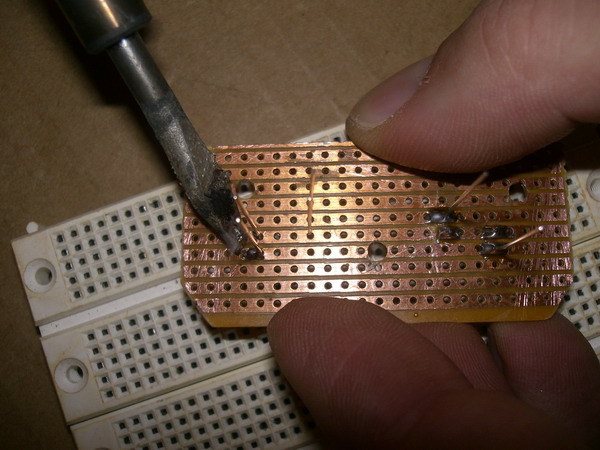
After carefully measuring the space that we would fit the tail lights, we dremelled a piece of PCB to size and started the soldering, again!
Soldering done, my nephews grasped the camera and started shooting:
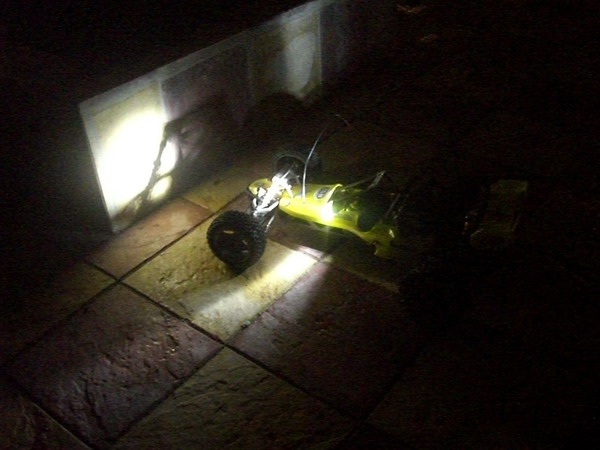
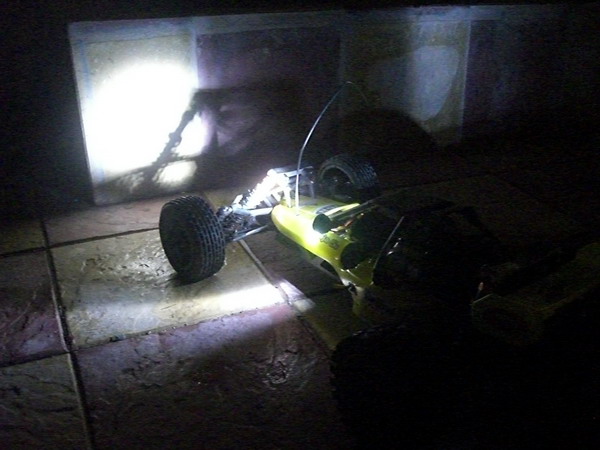
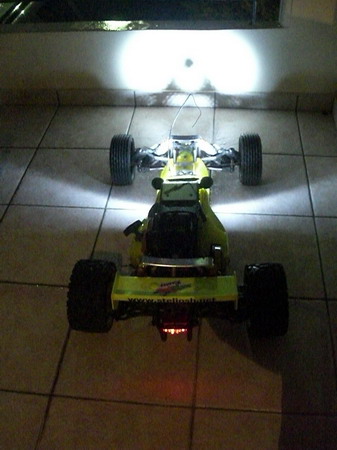
Front lights ablaze!
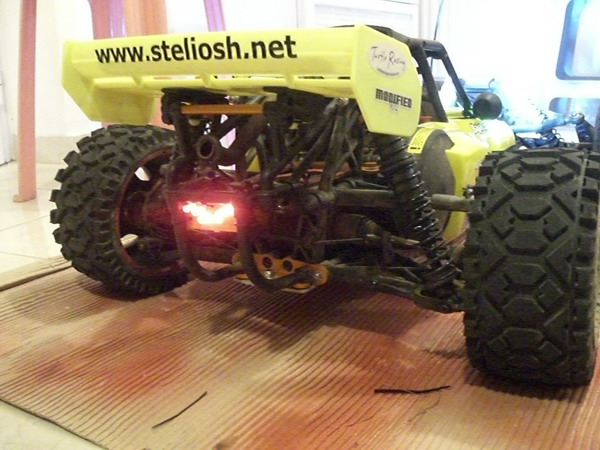
Rear lights on!
What a nice pattern of lights!!!
However, we are considering moving the light pods to the front, right under the TR HD shock mount, because the shock tower intrudes in the light beam.
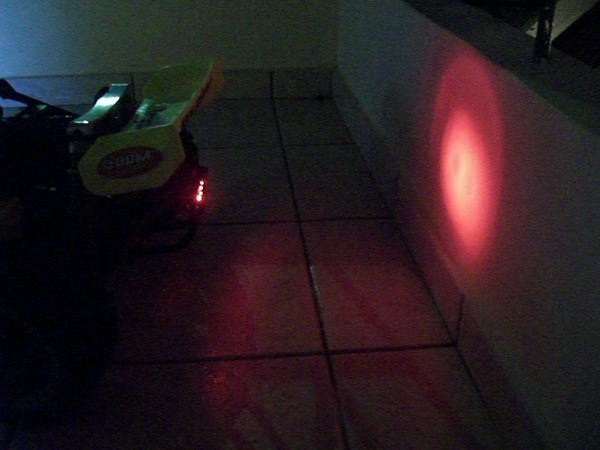
Finally... the tail lights, emit a nice pattern on the wall!
Next project (after the race, however!) is to add working brake lights...