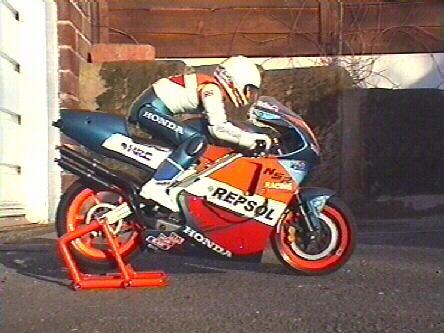
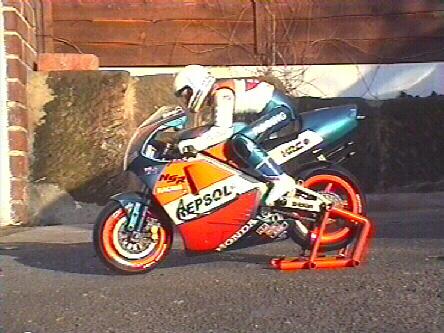
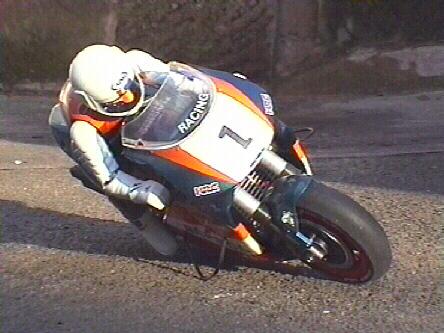
The Repsol Honda NSR500!
It all started like this! A wonderful idea!
Mr. Justin Mills, from the UK, sent me the following e-mail, a few days ago:
I have a Mk2 Nsr500 too , there great fun !
I have it painted in the repsol team format
I was wondering if you wanted any pics for your site?

While on the subject , Why not have a bike gallery page
for all the nsr owners around the world, can have their
machine for the world to see.
So, here we go!
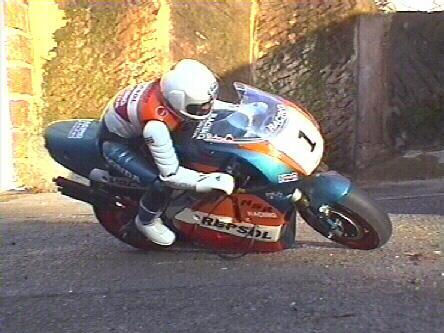
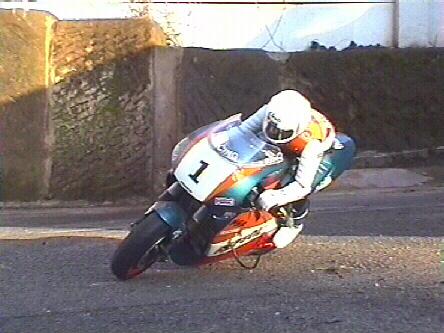
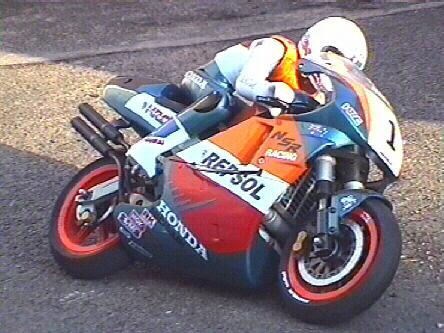
This is his bike, basically the same kit as mine, reviewed elsewhere, in my pages, only... better looking! And, of course, updated to the 1996 colors of the Repsol-Honda Team.
Enjoy the photos...
More details on how this was achieved, can be found below the pics!
For now, click on the thumbnails to view larger pics. Their dimensions are: 444X333 pixels, .jpg format, size around 30kb each.
This is how it was done...
The first thing to do is to get hold on a copy of a Mick Doohan nsr500 picture to look at where the breaks are for the different colours
used on the bike.
Next you need a fairing & body kit , if you want to keep the original rothmans style, these are available as spares. Also you need the another NSR500 decal set , again available as spares.
The paint I used on the bike is car spray paint, you know the type they sell in the motor shops for touching up your rust patches & bent wings.I like to use car paint , because of more colour selection, Its quick drying and the spray gives a good finish. Also they do touchup sticks if you scratch your paintwork.
So here are the colours :-
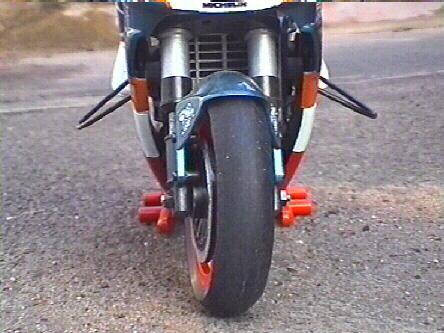
Wheel Rims : FORD CARNIVAL RED
Stand : FORD CARNIVAL RED
Fairing : VAUXHALL GLACIER WHITE (white)
& body
: VOLKSWAGEN BRILLIANT ORANGE (orange)
: FORD RADIENT RED (red)
: VAUXHALL LAGOON BLUE PEARLESCENT (blue)
Painting -
First spray all components with the white.
Then get some spray masking film cut out to the correct shape according to your reference picture. Making sure the edges of the film are well rubbed down. Spray a little as possible to achieve a good finish. Carry on this proceedure of masking & spraying, making sure that the area you have just sprayed is fully dry & not going to get any overspray from the new colour.
I find that a light preheating of the parts in a oven (35 - 40 deg C) makes the paint form a good finish, also I put the sprayed parts back in the oven for 5 mins - this gives a glass like finish.
NB- all other parts remain the same colour as before (forks, exhausts, frame, discs & brakes)
Decals -
All the decal I have used are from the original NSR decal sheets as suppied with the kit. I just selected, cut to fit , the relevent
ones to suit, again using the picture as a reference.
The number 1 & REPSOL decals are times new roman & arial fonts printed out on a sheet of paper, this is then photocopied onto
a clear self addesive photocopy film. Which are cut to size and applied to model. The REPSOL writing is not exactly right, but its close enough.
Finally after all the decals are on then a VERY LIGHT Clear lacquer is applied just to seal the decal edges.
Back to the top
If you'd like to see your pride and joy in these pages, it's a matter of moments away! Send me an e-mail and the rest is my pleasure!
My E-mail address is: steliosh@steliosh.net
Let's go back and see more R/C bikes!